

Our take: Fake vendors and redirected payments both depend on a vendor record that nobody checked very closely, and five checks at setup, plus a short list of moments that trigger a recheck, close much of that opening.
Why it matters: Organizations with fewer than 100 employees had the highest median fraud loss of any size group in the ACFE's 2026 study, and since June, Nacha's rules have required businesses that send ACH payments to keep documented, risk-based processes for spotting fraudulent ones.
The short answer: A vendor verification checklist is the set of checks you run before adding a new supplier or contractor to the system you pay from. Before the first payment, confirm the business is registered and in good standing, confirm who you're dealing with, verify that the bank account belongs to the vendor, collect a W-9 and validate the tax ID, and record a contact you reached on your own. After that, recheck whenever bank or contact details change, and review the full vendor list once a year.
Ask a finance team where payment fraud happens and most people will point to the payment itself, the wire that went to the wrong place, or the invoice that never should have been approved. That's where fraud gets noticed. It usually gets its start somewhere quieter, often in the vendor record within your accounting or payments system that houses details on vendor identity, contact information, and payment instructions.
Every field of data in the vendor record is something a fraudster would like to control. A fake vendor needs a record to get paid at all, and an impersonator needs the bank account on a real vendor's record changed. When it's built in a hurry from whatever the vendor happened to send over, it becomes easier for fraudsters to penetrate.
Small businesses tend to feel this most. The Association of Certified Fraud Examiners' 2026 Report to the Nations found that organizations with fewer than 100 employees had the highest median loss of any size group, at $126,000 per case. Billing schemes, including employees invoicing their own employer through shell companies, showed up in about a fifth of all cases.
Banks and payment companies call this kind of checking Know Your Business, or KYB. In September the Federal Trade Commission settled with two payment processors, Nuvei for $4.85 million and Humboldt Merchant Services for $12 million, over allegations that they kept serving merchants they should have screened out. A small business paying its suppliers isn't held to a processor's standard, but the idea behind KYB carries over well to vendor due diligence. You should know who is on the other end of a payment before you send it.
Nacha, which writes the operating rules for ACH payments, began requiring every business that originates ACH entries to have risk-based processes for identifying fraudulent payments as of June 2026, including payments made under false pretenses. Nacha leaves the specifics to each business. We think that a written vendor verification checklist, run every time you add a vendor or a vendor's details change, is a sensible place to start.
The five checks to run before you add a vendor
Run these checks as part of your vendor onboarding process, before a vendor goes into your system, and well before the first invoice is due. None of them are complicated, and most take a few minutes. What matters is doing all five, every time, for every vendor.
Confirm the business is real and in good standing
Nearly every U.S. company, LLC, and partnership registers with a state, usually through the secretary of state's office, and most states let you search those records online for free. Look up the vendor's legal name and check three things:
- That the entity is active
- That its formation date makes sense for a company claiming years of experience
- That the registered address roughly matches what the vendor gave you
As you check, take note of red flags. For example, a business that says it has been operating since 2010 and was registered last month deserves a question.
Then run the business name through the Treasury Department's free OFAC sanctions search, since U.S. businesses are generally prohibited from dealing with anyone on those lists.
Confirm who you're dealing with
A registered company tells you the business exists. It doesn't tell you the person emailing you works there. Confirm how your contact connects to the company, whether as an owner named in the state filing or as an employee you can confirm by calling the company's main number. For 1099 contractors, confirm the individual is who they say they are and that their name matches their tax ID.
Verify the bank account belongs to the vendor
This is the check that matters most, and it's the one that's easiest to skip. An account number on an invoice or a form proves only that somebody typed it. You need confirmation from outside the vendor's own paperwork, which usually means one of a few bank account verification methods.
- Instant account verification. The vendor connects their bank through a secure service that confirms the account is open and returns the holder's name.
- Micro-deposit verification. You send two small deposits and the vendor confirms the amounts. This shows the account is open and that the vendor can see it.
- Account ownership checks. Many banks and verification services can confirm whether a name matches an account's owner.
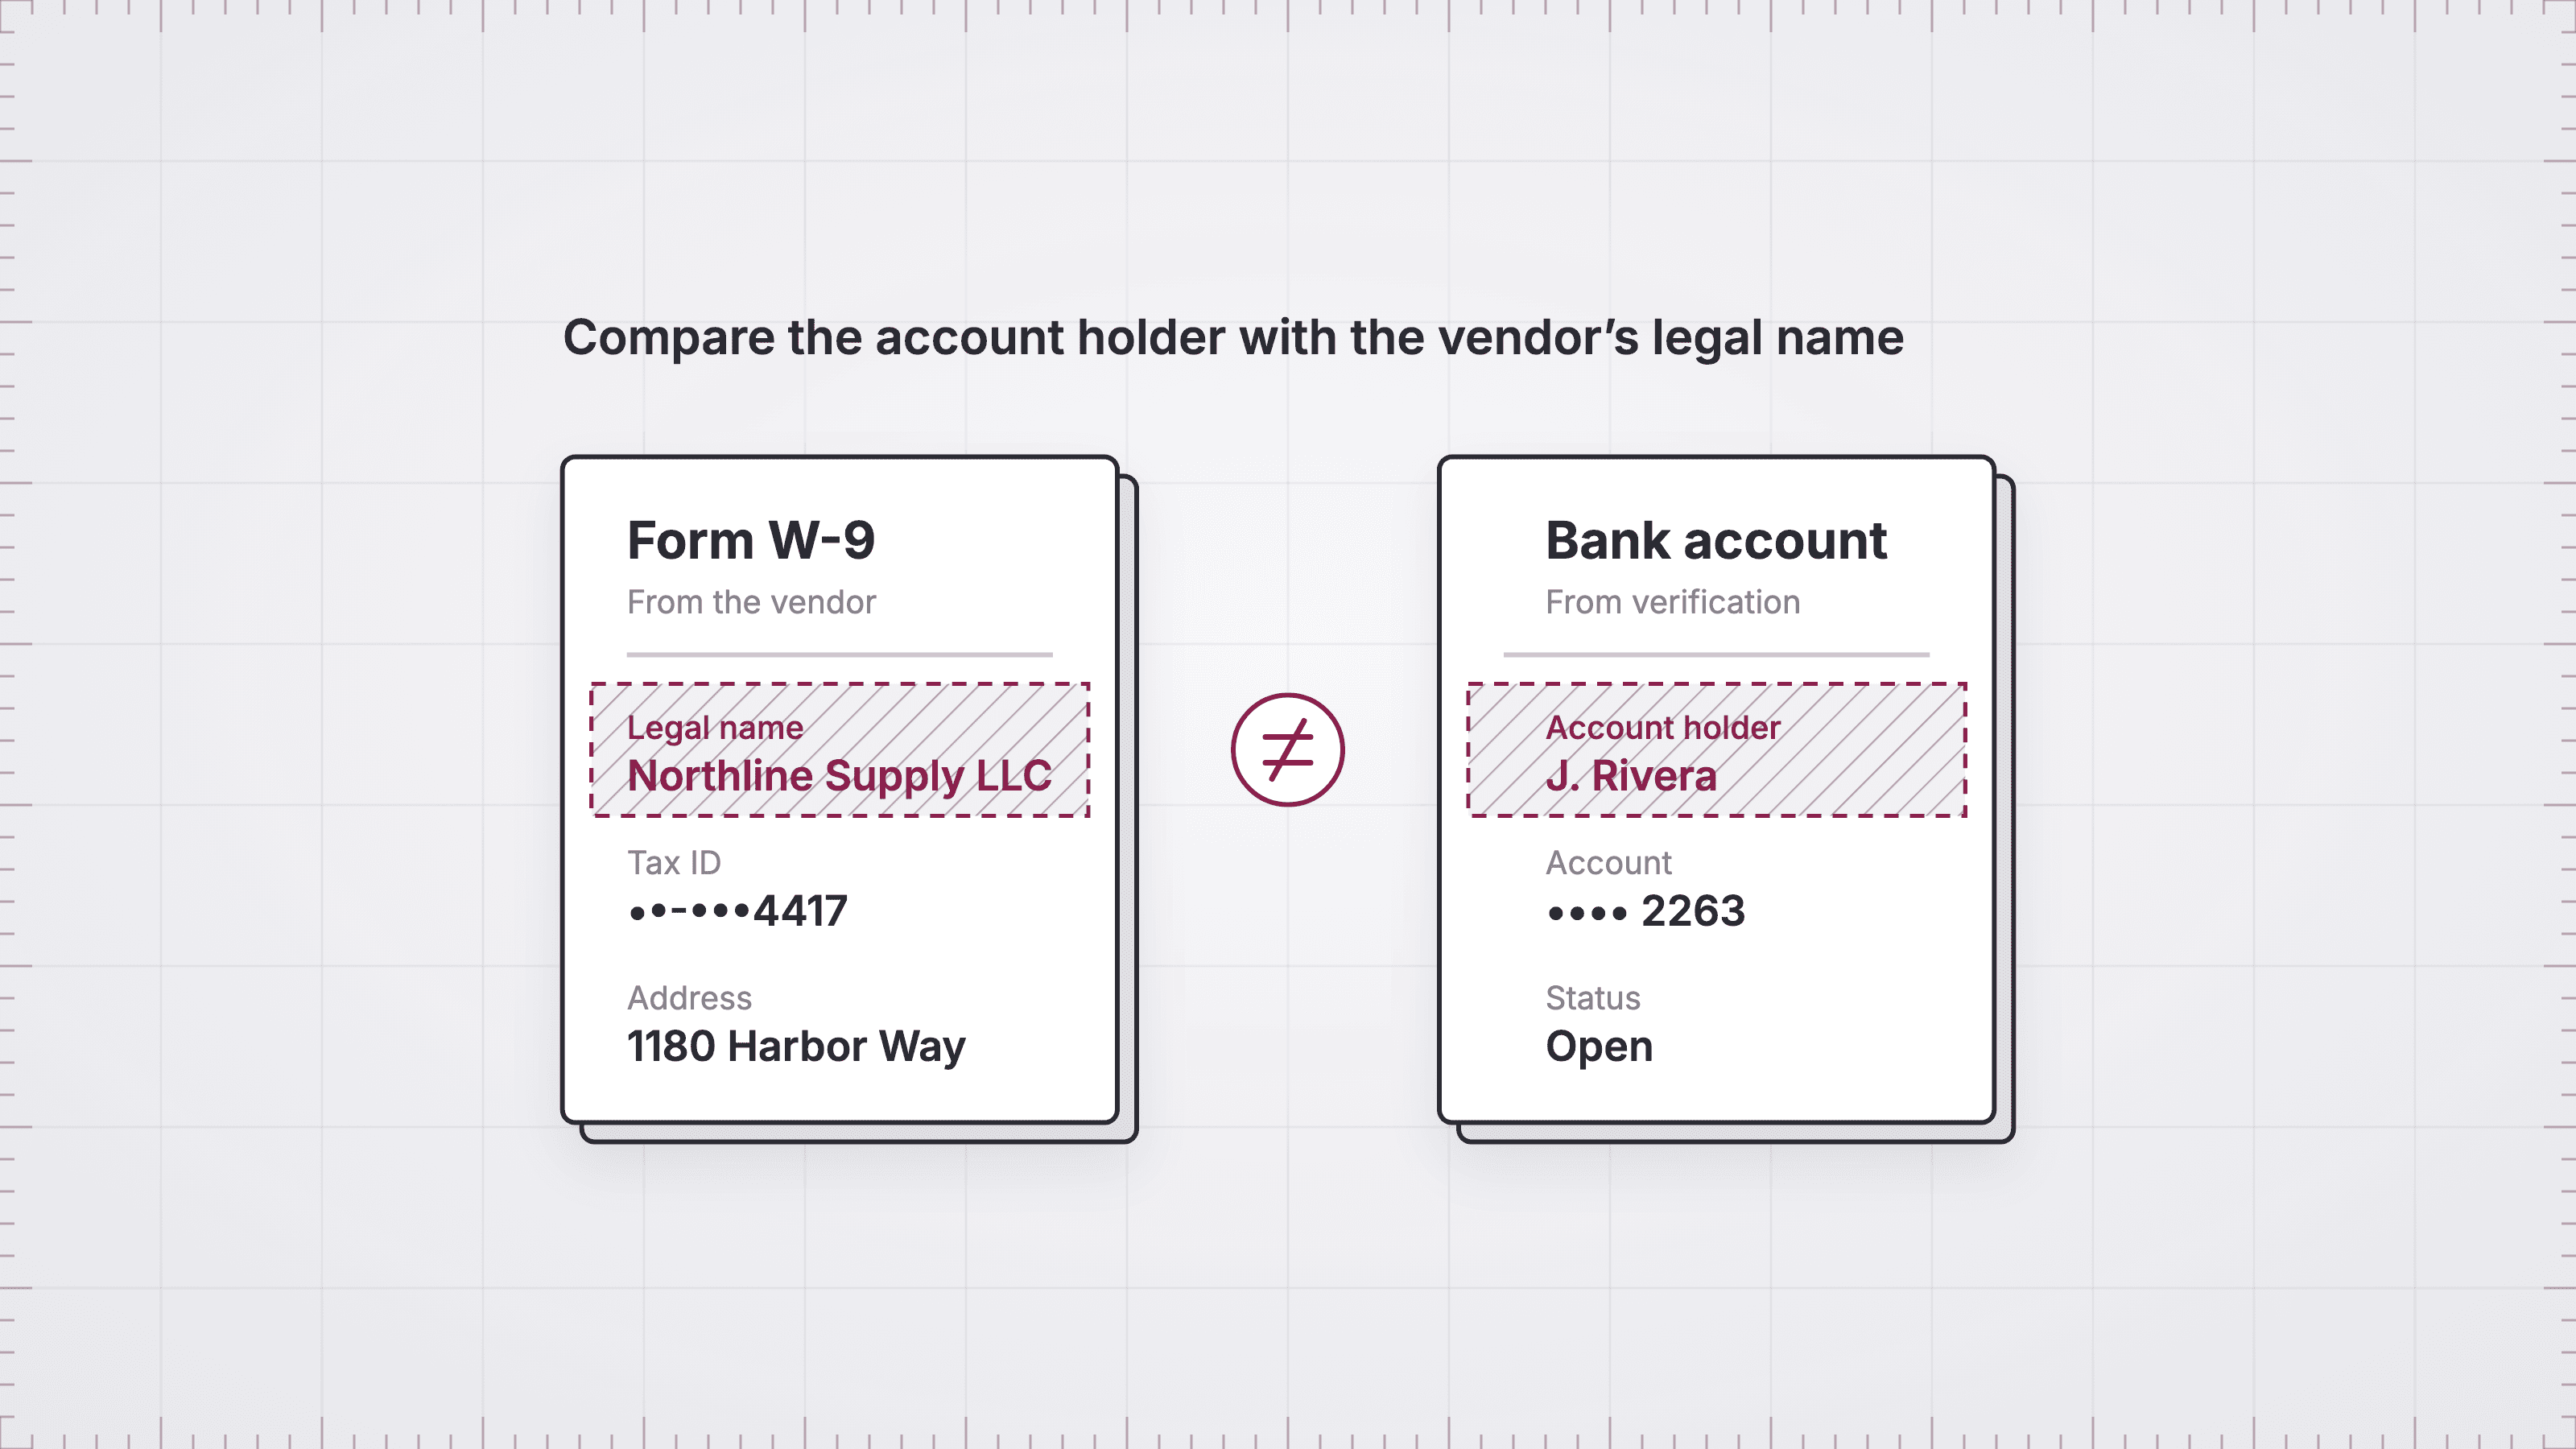
Be wary of bank letters, which are easy to fake. In a 2025 case reported by ENR, a fraudster's request to redirect $6.7 million from the city of Portland, Oregon arrived with one attached. Whatever method you use, compare the account holder's name with the vendor's legal name. A mismatch isn't always fraud, since some small businesses do bank under an owner's personal name. But it is always worth a phone call.
Collect a W-9 and validate the tax ID
Form W-9 gives you a U.S. vendor's legal name, tax classification, and taxpayer identification number, or TIN. Collect it before the first payment. If a vendor you're required to report on doesn't provide a TIN, you are generally required to withhold 24% of reportable payments, which is called backup withholding.
Once you have the form, check it with IRS TIN Matching, a free program for businesses that file 1099s, which tells you whether a name and TIN combination matches IRS records. A mismatch is a tax problem. It can also be the first sign that the vendor isn't who it claims to be.
Record a contact you reached on your own
Find a phone number for the vendor somewhere other than its emails, such as its website, its state filing, or a contract you signed together. Call it, and write down who you spoke with and when.
This is the number you'll use when an email arrives saying the vendor has changed banks. We covered what happens without one in The Most Expensive Email Your AP Team Will Ever Get.
Red flags that should slow you down
Most new vendors sail through all five checks. Any of these is a reason to pause before one is approved.
- The name on the bank account doesn't match the vendor's legal name.
- The vendor's address is a P.O. box or a residence, or it matches a staff member's address, a classic sign of an inside job.
- The vendor won't provide a W-9, or its TIN fails matching.
- A brand-new vendor's first invoice is unusually large, unusually urgent, or both.
- The contact uses a free personal email address while presenting as an established company.
- The same bank account appears on more than one vendor record.
None of these proves fraud on its own. Each one earns a closer look.
How to re-verify vendors you already pay
Verification at setup covers the vendor as it looked on the day you added it. Businesses change banks, move offices, and lose staff, and fraudsters count on those changes going unchecked.
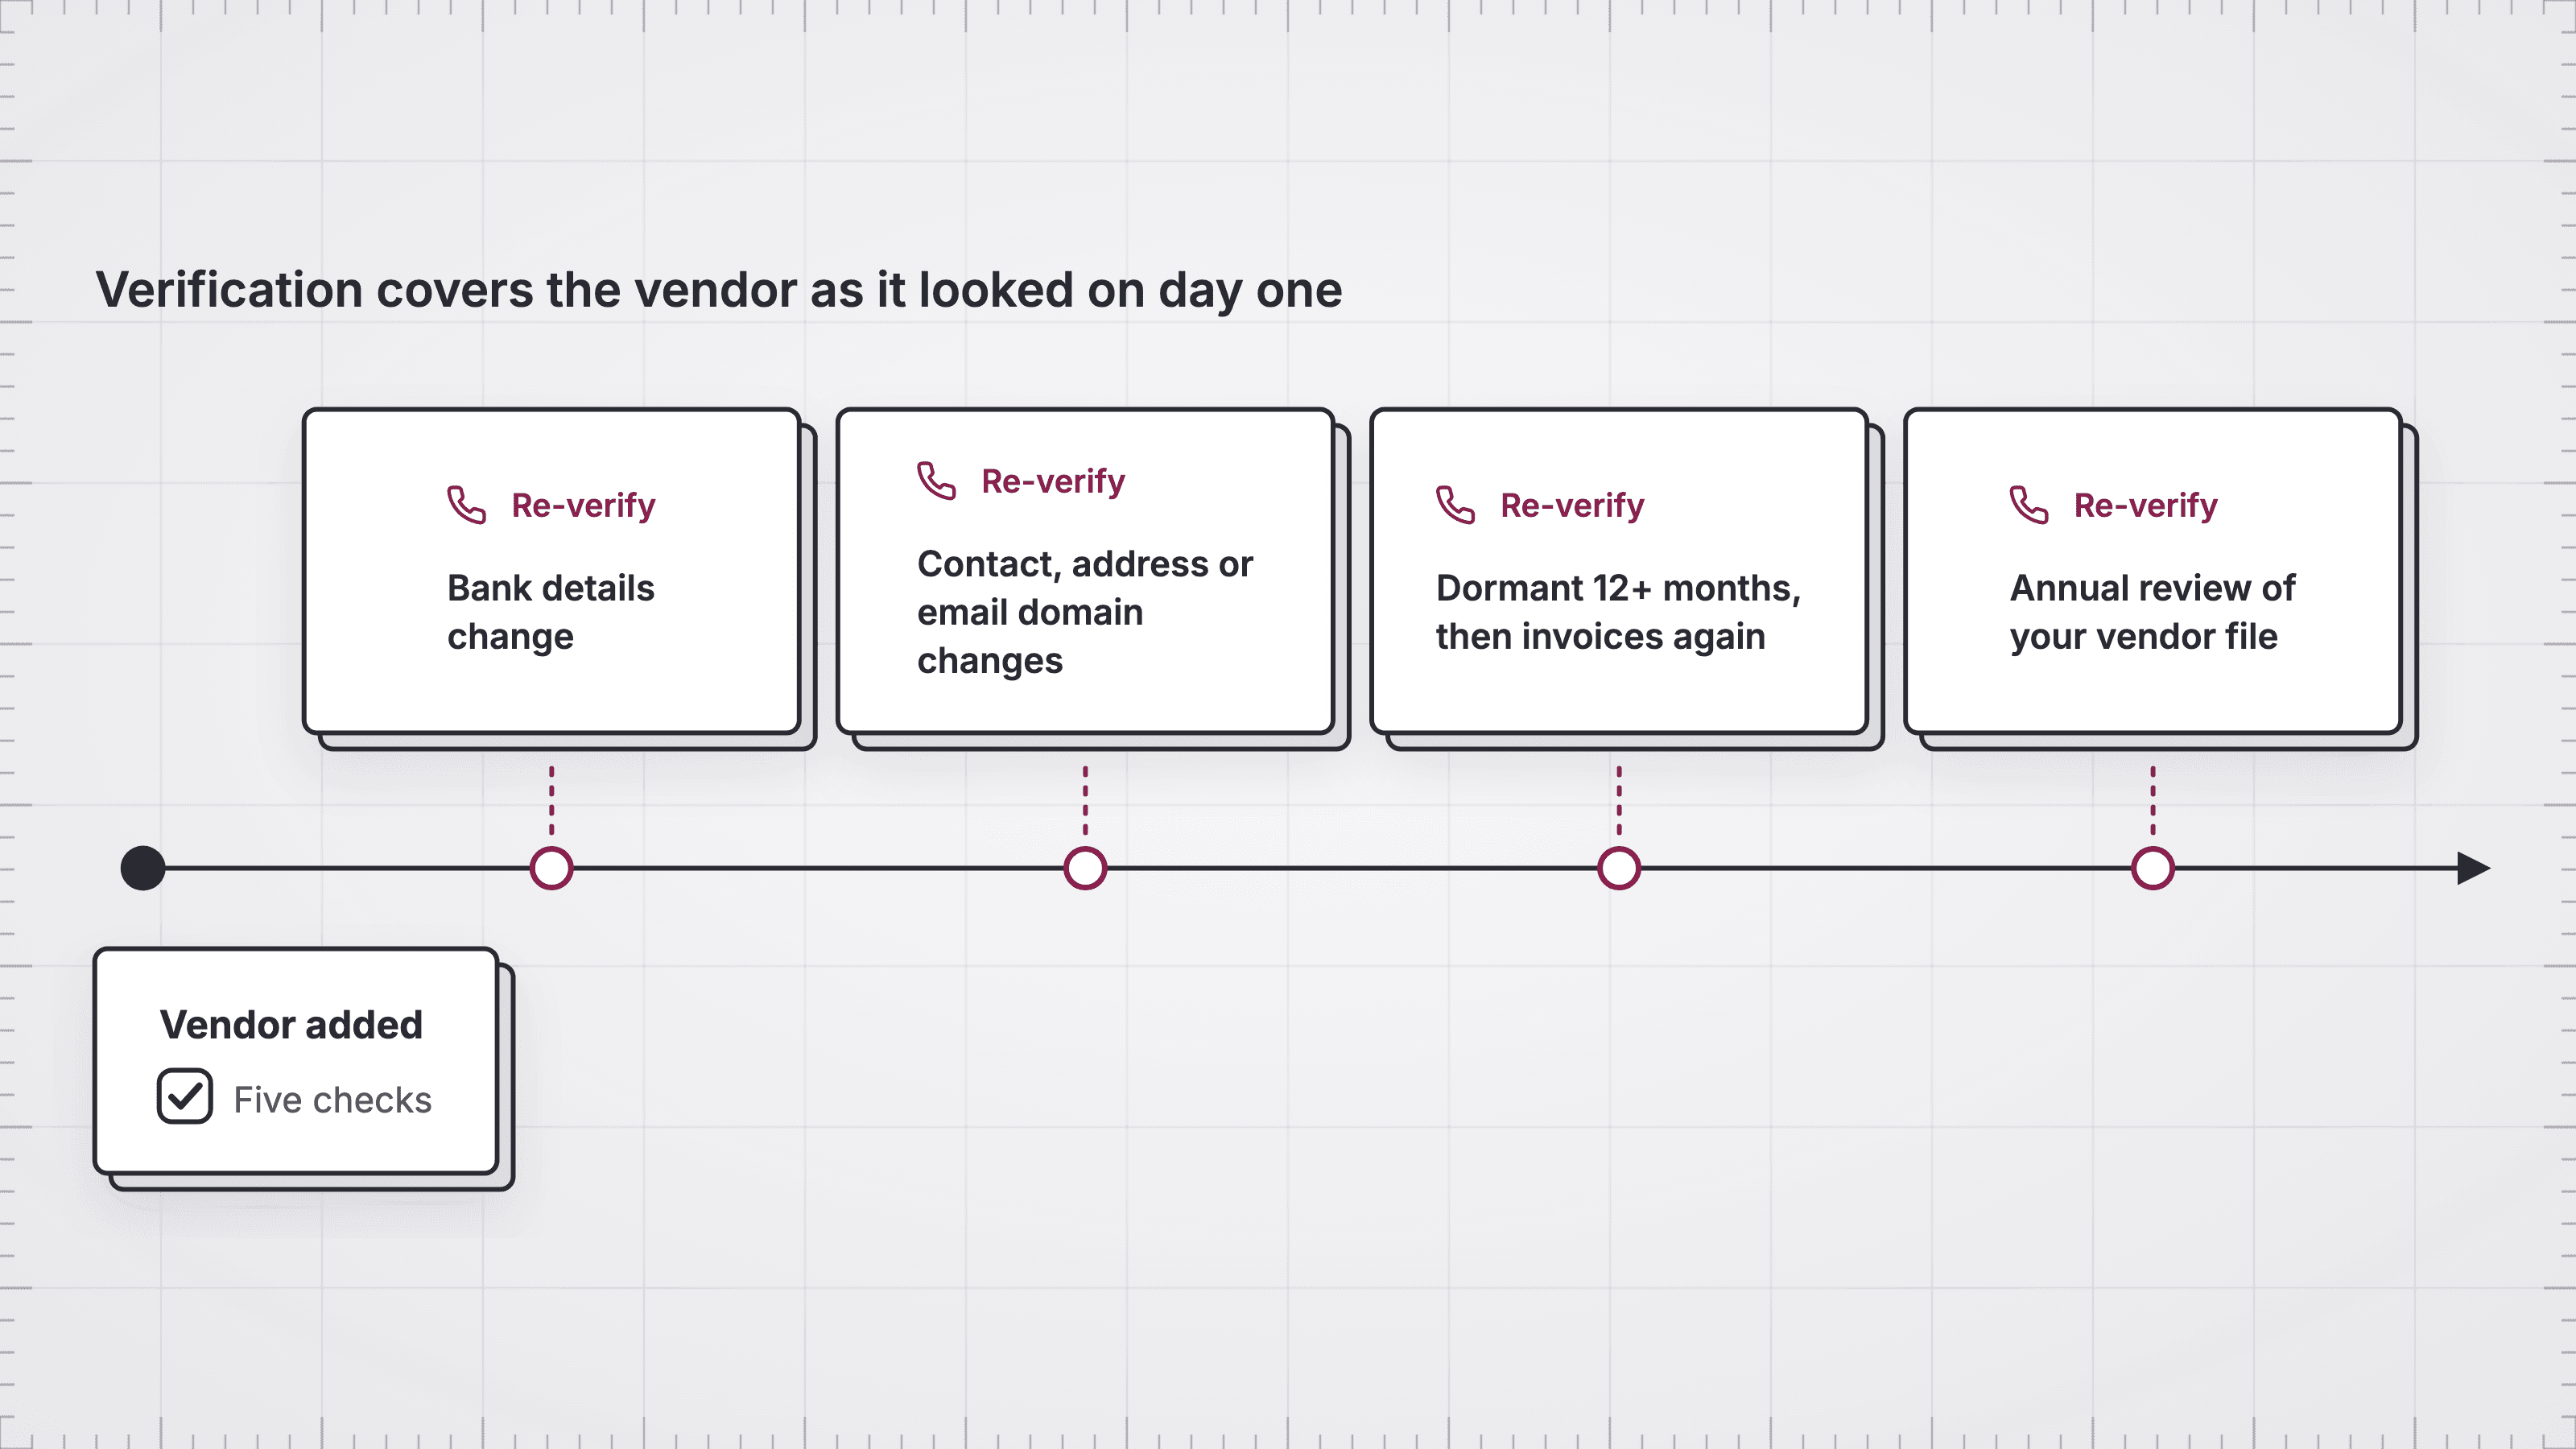
- Any change to bank details. Verify the new account the way you verified the first, and confirm by calling the contact you recorded at setup.
- A change of contact, address, or email domain. Confirm it through the contact you already have.
- A dormant vendor that suddenly invoices again. After a year or more without payments, treat it almost like a new vendor.
- An annual review of your whole vendor master file. Deactivate vendors you no longer use, merge duplicate records, refresh outdated W-9s, and spot-check that your largest vendors are still in good standing.
The annual review is the step most teams skip. It's tedious and rarely turns anything up, until the year it does.
Build the checklist into how vendors get added
A checklist only works if someone remembers it on a busy day, so the teams with the cleanest vendor records build it into the process. Vendors submit their own details through a form instead of an email, nobody types a routing number off a PDF, and the system records what was checked and when.
That reasoning shaped vendor onboarding in Nickel. You send a new vendor a secure link, and the vendor enters their own business and payment details instead of emailing them to you. Nickel verifies the bank details before the first payment, then syncs the vendor record to QuickBooks. That takes care of the bank account check as part of adding the vendor, and keeps routing numbers out of your inbox.
The other checks stay with you, and the fifth is one we'd encourage you to keep that way. A call to a number you found yourself is the one step software can't take for you, and it protects you when bank details change later. Payments then go out through Nickel Bill Pay, where you can require an approval before money leaves, so the person who adds a vendor doesn't have to be the one who pays it.
Five checks, once, and then a habit
Vendor fraud rarely looks dramatic from the inside. It looks like a rushed vendor setup, or a bank change approved because the email seemed fine. The five checks take a little longer the first time. After that they become how your team works.
If you'd like to see how the checks work in Nickel, our team can walk you through it.
FAQs
What is vendor verification?
Vendor verification confirms that a supplier or contractor is a legitimate business, that your contact really represents it, and that the bank account you'll pay belongs to it. It happens before a vendor is added and again whenever key details change.
What should a vendor verification checklist include?
A basic checklist has five checks. Confirm the business is registered and in good standing, confirm your contact's identity, verify the vendor owns the bank account, collect a W-9 and validate it through IRS TIN Matching, and record a phone contact you reached independently.
What does KYB mean?
KYB stands for Know Your Business, the term banks and payment companies use for verifying that a business customer is real, legally registered, and owned by who it claims. The same principles apply to vetting your own vendors.
How do you verify a vendor's bank account?
Confirm ownership independently of the vendor's paperwork, using instant account verification, an account ownership check, or micro-deposits. Then compare the account holder name with the vendor's legal name, and treat bank letters with caution.
How often should you re-verify existing vendors?
Re-verify a vendor whenever its bank details, contact person, address, or email domain changes, and whenever a vendor you haven't paid in a year or more invoices again. Review the full vendor list at least once a year.
Does Nickel verify vendors?
Nickel verifies vendors' bank details. Its vendor onboarding has vendors submit their own business and payment details through a secure link, then verifies the bank account before the first payment. Nickel recommends pairing this with the other checks on this list, and with a call to an independently sourced contact whenever bank details change.


